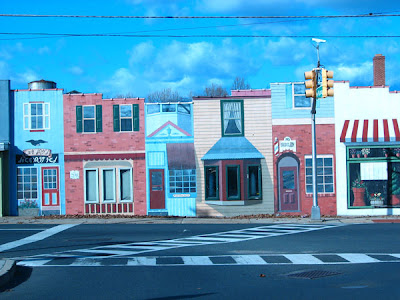
This is my original photo (sotc) - notice the blue color cast on the photo that makes it look so drab.

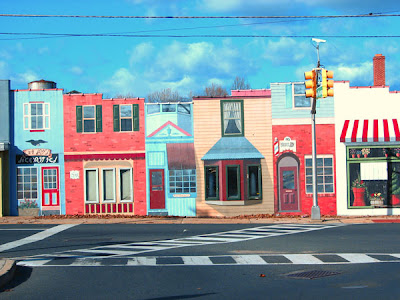
This is my photo after I removed the color cast. Notice how the colors seem brighter.

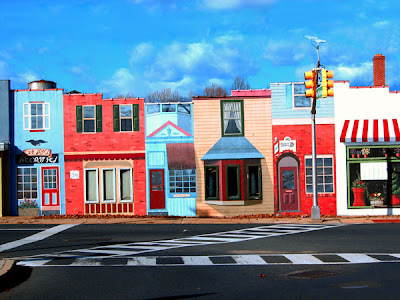
This is my final photo. Color cast removed, levels adjusted and unsightly cable wires removed. It hardly looks like the same photo, doesn't it? Here is what I did.
1. Open your photo.
2. Duplicate your photo.
Here are 2 ways to do it: (1) Drag the photo to the CREATE NEW LAYER button
(2) Select layer and press CTRL J
3. On the toolbar, go to IMAGE>ADJUSTMENTS>MATCH COLOR.
Under IMAGE OPTIONS, click on NEUTRALIZE.
Under IMAGE OPTIONS, click on NEUTRALIZE.
If the photo looks too dull, click on the FADE slider until it starts to look good to you.
(I usually try 50 percent)
You can also adjust the COLOR INTENSITY. Play with it until you are happy with it.
4. I then created an CURVES adjustment level layer: IMAGE>ADJUSTMENT>CURVES and selected the first dropper (black adjustment) and then click on an area of the picture that had the blackest color. It automatically darkened it for me. I then clicked on the 3rd dropper (white adjustment) and again, selected an area of the photo that was white and it automatically lightened it for me. The problem is that most times this feature overcompensates by lightening or darkening too much. At this point, I tend to scrap the changes and start over by playing around with the curve anchor points until I am satisfied with the with the brightness and darkness of my photo.
I hope this helps. Have a wonderful day. Kait
2339
No comments:
Post a Comment